In this blog post I’m gonna show you how to use the OOB Taxonomy picker control without any server side control or code, just using JavaScript.
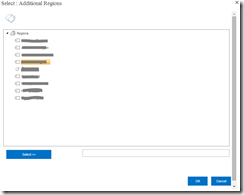
As you probably know, the Taxonomy picker control is the TaxonomyWebTaggingControl class, that looks like:
However, all the core functionality of this control is actually done by JavaScript so, in some cases, can be useful how to reuse all of this functionality without any server side stuff, for example, imagine you can add a Taxonomy picker control using a Script editor web part, letting the user pick a Term and then execute some custom JS code.
If someone is curious, I got all this knowledge with some reflection from the TaxonomyWebTaggingControl class, and some hours reading a lot of JS code that SharePoint generates when you work with Taxonomy fields (no magic ![]() )
)
First thing you need to know is that almos all of the Taxonomy picker control functionality is inside the Script “scriptforwebtaggingui.js”, and if you are working with Taxonomy, likely you’ll also need the file “sp.taxonomy.js”, so, ensure you have a reference to this files an option to this could be using the ScriptLink, if you can edit the MasterPage:
|
1 |
<span style="color: #606060" id="lnum1"> 1:</span> <span style="color: #0000ff"><</span><span style="color: #800000">SharePoint:ScriptLink</span> <span style="color: #ff0000">ID</span><span style="color: #0000ff">="ScriptLink2"</span> <span style="color: #ff0000">name</span><span style="color: #0000ff">="scriptforwebtaggingui.js"</span> <span style="color: #ff0000">OnDemand</span><span style="color: #0000ff">="true"</span> <span style="color: #ff0000">runat</span><span style="color: #0000ff">="server"</span> <span style="color: #ff0000">Localizable</span><span style="color: #0000ff">="false"</span> <span style="color: #0000ff">/></span> |
|
1 |
<span style="color: #606060" id="lnum2"> 2:</span> <span style="color: #0000ff"><</span><span style="color: #800000">SharePoint:ScriptLink</span> <span style="color: #ff0000">ID</span><span style="color: #0000ff">="ScriptLink1"</span> <span style="color: #ff0000">name</span><span style="color: #0000ff">="sp.taxonomy.js"</span> <span style="color: #ff0000">OnDemand</span><span style="color: #0000ff">="true"</span> <span style="color: #ff0000">runat</span><span style="color: #0000ff">="server"</span> <span style="color: #ff0000">Localizable</span><span style="color: #0000ff">="false"</span> <span style="color: #0000ff">/></span> |
or, you can use the SP.SOD framework. Here is the JS code generated by the first ScriptLink above:
|
1 |
<span style="color: #606060" id="lnum1"> 1:</span> RegisterSod(<span style="color: #006080">"scriptforwebtaggingui.js"</span>, <span style="color: #006080">"https:u002fu002fcdn.sharepointonline.comu002f10477u002f_layoutsu002f15u002f16.0.2930.1217u002fscriptforwebtaggingui.js"</span>); |
|
1 |
<span style="color: #606060" id="lnum2"> 2:</span> RegisterSodDep(<span style="color: #006080">"scriptforwebtaggingui.js"</span>, <span style="color: #006080">"sp.js"</span>); |
|
1 |
<span style="color: #606060" id="lnum3"> 3:</span> RegisterSodDep(<span style="color: #006080">"scriptforwebtaggingui.js"</span>, <span style="color: #006080">"sp.ui.rte.js"</span>); |
|
1 |
<span style="color: #606060" id="lnum4"> 4:</span> RegisterSodDep(<span style="color: #006080">"scriptforwebtaggingui.js"</span>, <span style="color: #006080">"scriptresources.resx"</span>); |
From HTML code, the Taxonomy picker control needs 2 html tags:
- One tag is a hidden tag, and will save the selected terms in the format: Label|Term_GUID;OtherLabel|TermGUID…
- The other tag is a DIV container, where JS code will inject the control, the show picker image, autocomplete options, and so on
|
1 |
<span style="color: #606060" id="lnum1"> 1:</span> <input name=<span style="color: #006080">"countryTaxControl"</span> type=<span style="color: #006080">"hidden"</span> id=<span style="color: #006080">"countryTaxControl"</span>> |
|
1 |
<span style="color: #606060" id="lnum2"> 2:</span> <div id=<span style="color: #006080">"countryTaxControlContent"</span> <span style="color: #0000ff">class</span>=<span style="color: #006080">"ms-taxonomy ms-taxonomy-height ms-taxonomy-width"</span>></div> |
Now, you need to Initialize the control from more JavaScript code. As you likely will need the Taxonomy JS code and a SharePoint context, this is a good way to ensure all the JS files needed are loaded first:
|
1 |
<span style="color: #606060" id="lnum1"> 1:</span> SP.SOD.executeFunc(<span style="color: #006080">'sp.js'</span>, <span style="color: #006080">'SP.ClientContext'</span>, <span style="color: #0000ff">function</span> () { |
|
1 |
<span style="color: #606060" id="lnum2"> 2:</span> SP.SOD.executeFunc(<span style="color: #006080">'sp.taxonomy.js'</span>, <span style="color: #006080">'SP.Taxonomy.TaxonomySession'</span>, init); |
|
1 |
<span style="color: #606060" id="lnum3"> 3:</span> }); |
Then, in the Init function, let’s initialize the Taxonomy picker control:
|
1 |
<span style="color: #606060" id="lnum1"> 1:</span> <span style="color: #0000ff">var</span> tagUI = document.getElementById(taxControlContentId); |
|
1 |
<span style="color: #606060" id="lnum2"> 2:</span> <span style="color: #0000ff">if</span> (tagUI) { |
|
1 |
<span style="color: #606060" id="lnum3"> 3:</span> tagUI[<span style="color: #006080">'InputFieldId'</span>] = taxControlInputId; |
|
1 |
<span style="color: #606060" id="lnum4"> 4:</span> tagUI[<span style="color: #006080">'SspId'</span>] = sspId; |
|
1 |
<span style="color: #606060" id="lnum5"> 5:</span> tagUI[<span style="color: #006080">'GroupId'</span>] = <span style="color: #006080">'00000000-0000-0000-0000-000000000000'</span>; |
|
1 |
<span style="color: #606060" id="lnum6"> 6:</span> tagUI[<span style="color: #006080">'TermSetId'</span>] = termSetId; |
|
1 |
<span style="color: #606060" id="lnum7"> 7:</span> tagUI[<span style="color: #006080">'AnchorId'</span>] = <span style="color: #006080">'00000000-0000-0000-0000-000000000000'</span>; |
|
1 |
<span style="color: #606060" id="lnum8"> 8:</span> tagUI[<span style="color: #006080">'IsMulti'</span>] = isMulti; |
|
1 |
<span style="color: #606060" id="lnum9"> 9:</span> tagUI[<span style="color: #006080">'AllowFillIn'</span>] = <span style="color: #0000ff">false</span>; |
|
1 |
<span style="color: #606060" id="lnum10"> 10:</span> tagUI[<span style="color: #006080">'WidthCSS'</span>] = <span style="color: #006080">'ms-taxonomy-width'</span>; |
|
1 |
<span style="color: #606060" id="lnum11"> 11:</span> tagUI[<span style="color: #006080">'JavascriptOnValidation'</span>] = <span style="color: #006080">""</span>; |
|
1 |
<span style="color: #606060" id="lnum12"> 12:</span> tagUI[<span style="color: #006080">'Lcid'</span>] = 1033; |
|
1 |
<span style="color: #606060" id="lnum13"> 13:</span> tagUI[<span style="color: #006080">'IsSpanTermSets'</span>] = <span style="color: #0000ff">false</span>; |
|
1 |
<span style="color: #606060" id="lnum14"> 14:</span> tagUI[<span style="color: #006080">'IsSpanTermStores'</span>] = <span style="color: #0000ff">false</span>; |
|
1 |
<span style="color: #606060" id="lnum15"> 15:</span> tagUI[<span style="color: #006080">'IsIgnoreFormatting'</span>] = <span style="color: #0000ff">false</span>; |
|
1 |
<span style="color: #606060" id="lnum16"> 16:</span> tagUI[<span style="color: #006080">'IsIncludeDeprecated'</span>] = <span style="color: #0000ff">false</span>; |
|
1 |
<span style="color: #606060" id="lnum17"> 17:</span> tagUI[<span style="color: #006080">'IsIncludeUnavailable'</span>] = <span style="color: #0000ff">false</span>; |
|
1 |
<span style="color: #606060" id="lnum18"> 18:</span> tagUI[<span style="color: #006080">'IsIncludeTermSetName'</span>] = <span style="color: #0000ff">false</span>; |
|
1 |
<span style="color: #606060" id="lnum19"> 19:</span> tagUI[<span style="color: #006080">'IsAddTerms'</span>] = <span style="color: #0000ff">false</span>; |
|
1 |
<span style="color: #606060" id="lnum20"> 20:</span> tagUI[<span style="color: #006080">'IsIncludePathData'</span>] = <span style="color: #0000ff">false</span>; |
|
1 |
<span style="color: #606060" id="lnum21"> 21:</span> tagUI[<span style="color: #006080">'IsUseCommaAsDelimiter'</span>] = <span style="color: #0000ff">true</span>; |
|
1 |
<span style="color: #606060" id="lnum22"> 22:</span> tagUI[<span style="color: #006080">'Disable'</span>] = <span style="color: #0000ff">false</span>; |
|
1 |
<span style="color: #606060" id="lnum23"> 23:</span> tagUI[<span style="color: #006080">'ExcludeKeyword'</span>] = <span style="color: #0000ff">false</span>; |
|
1 |
<span style="color: #606060" id="lnum24"> 24:</span> tagUI[<span style="color: #006080">'WebServiceUrl'</span>] = _spPageContextInfo.webServerRelativeUrl + <span style="color: #006080">'u002f_vti_binu002fTaxonomyInternalService.json'</span>; |
|
1 |
<span style="color: #606060" id="lnum25"> 25:</span> tagUI[<span style="color: #006080">'FieldName'</span>] = fieldName; |
|
1 |
<span style="color: #606060" id="lnum26"> 26:</span> tagUI[<span style="color: #006080">'FieldId'</span>] = <span style="color: #006080">'00000000-0000-0000-0000-000000000000'</span>; |
|
1 |
<span style="color: #606060" id="lnum27"> 27:</span> tagUI[<span style="color: #006080">'DisplayPickerButton'</span>] = showPickerButton; |
|
1 |
<span style="color: #606060" id="lnum28"> 28:</span> <span style="color: #0000ff">var</span> _emmTaggingLoadCall; |
|
1 |
<span style="color: #606060" id="lnum29"> 29:</span> <span style="color: #0000ff">if</span> (_emmTaggingLoadCall == <span style="color: #0000ff">null</span>) { |
|
1 |
<span style="color: #606060" id="lnum30"> 30:</span> _emmTaggingLoadCall = <span style="color: #0000ff">true</span>; |
|
1 |
<span style="color: #606060" id="lnum31"> 31:</span> SP.SOD.executeFunc(<span style="color: #006080">'ScriptForWebTaggingUI.js'</span>, <span style="color: #006080">'Microsoft.SharePoint.Taxonomy.ScriptForWebTaggingUI.taggingLoad'</span>, |
|
1 |
<span style="color: #606060" id="lnum32"> 32:</span> <span style="color: #0000ff">function</span> () { |
|
1 |
<span style="color: #606060" id="lnum33"> 33:</span> Microsoft.SharePoint.Taxonomy.ScriptForWebTaggingUI.resetEventsRegistered(); |
|
1 |
<span style="color: #606060" id="lnum34"> 34:</span> }); |
|
1 |
<span style="color: #606060" id="lnum35"> 35:</span> } |
|
1 |
<span style="color: #606060" id="lnum36"> 36:</span> SP.SOD.executeFunc(<span style="color: #006080">'ScriptForWebTaggingUI.js'</span>, <span style="color: #006080">'Microsoft.SharePoint.Taxonomy.ScriptForWebTaggingUI.onLoad'</span>, |
|
1 |
<span style="color: #606060" id="lnum37"> 37:</span> <span style="color: #0000ff">function</span> () { |
|
1 |
<span style="color: #606060" id="lnum38"> 38:</span> Microsoft.SharePoint.Taxonomy.ScriptForWebTaggingUI.onLoad(taxControlContentId); |
|
1 |
<span style="color: #606060" id="lnum39"> 39:</span> }); |
|
1 |
<span style="color: #606060" id="lnum40"> 40:</span> } |
Most of the params are self-explained, and also are the same params in the TaxonomyWebTaggingControl class. Interesting params are:
- taxControlContentId: this is the ID from the DIV container in the HTML I showed you above.
- InputFieldId: ID of the Hidden control.
- SspId: This is the TermStore ID. I’ll show you later how to get that ID from more JS code.
- termSetId: Term set ID that you want to bind the control. You can get it using sp.taxonomy.js, for example, get the ID from the TermSet name.
Here is the code to get the Term Store ID (SspId):
|
1 |
<span style="color: #606060" id="lnum1"> 1:</span> <span style="color: #0000ff">var</span> context = <span style="color: #0000ff">new</span> SP.ClientContext.get_current(); |
|
1 |
<span style="color: #606060" id="lnum2"> 2:</span> <span style="color: #0000ff">var</span> session = SP.Taxonomy.TaxonomySession.getTaxonomySession(context); |
|
1 |
<span style="color: #606060" id="lnum3"> 3:</span> <span style="color: #0000ff">var</span> termStore = session.getDefaultSiteCollectionTermStore(); |
|
1 |
<span style="color: #606060" id="lnum4"> 4:</span> |
|
1 |
<span style="color: #606060" id="lnum5"> 5:</span> context.load(session); |
|
1 |
<span style="color: #606060" id="lnum6"> 6:</span> context.load(termStore); |
|
1 |
<span style="color: #606060" id="lnum7"> 7:</span> |
|
1 |
<span style="color: #606060" id="lnum8"> 8:</span> context.executeQueryAsync( |
|
1 |
<span style="color: #606060" id="lnum9"> 9:</span> <span style="color: #0000ff">function</span> () { |
|
1 |
<span style="color: #606060" id="lnum10"> 10:</span> sspId = termStore.get_id(); |
|
1 |
<span style="color: #606060" id="lnum11"> 11:</span> sspId = sspId.toString(); |
|
1 |
<span style="color: #606060" id="lnum12"> 12:</span> <span style="color: #008000">//configure controls ...</span> |
|
1 |
<span style="color: #606060" id="lnum13"> 13:</span> }, |
|
1 |
<span style="color: #606060" id="lnum14"> 14:</span> <span style="color: #0000ff">function</span> () { |
|
1 |
<span style="color: #606060" id="lnum15"> 15:</span> console.log(<span style="color: #006080">"Unable to access Managed Metadata Service."</span>) |
|
1 |
<span style="color: #606060" id="lnum16"> 16:</span> } |
|
1 |
<span style="color: #606060" id="lnum17"> 17:</span> ); |
Finally, let’s say you wanna set a value before loading the control, for example, you get the Field value or a User profile Taxonomy property, and you want to set the control with that value. In this case, you just have to set the Hidden control value, like:
|
1 |
<span style="color: #606060" id="lnum1"> 1:</span> $(<span style="color: #006080">"#regionTaxControl"</span>).val(<span style="color: #006080">"SharePoint|123413456-aaaa-aa11-aa22-123456789012;Javascript|123413456-aaaa-aa11-aa22-123456789012"</span>); |
You have to do that before configuring the control, before calling the:
|
1 |
<span style="color: #606060" id="lnum1"> 1:</span> Microsoft.SharePoint.Taxonomy.ScriptForWebTaggingUI.onLoad(taxControlContentId); |
and that’s all ! you will get all the Taxonomy picker functionality and styling (obviously, you have to manage what you wanna do with the selected values, the loading and saving functionality is not done by the control)
Last note
If you’re using SharePoint apps and want to use the Taxonomy picker, you can use the code from AMS Office code, where Richard diZerega has made a great job creating a JS control with almost same functionality that the OOB Taxonomy picker control.
Also, that code can be used inside SharePoint, as is using just jQuery and SP JSOM. I did it and worked fine. However, that control has some lacks comparing with the OOB, like for example, you can’t use the keyboard to select the Terms, only the mouse (users are use to type, use the arrows, and enter tab to select a Term). This can’t be done with the code sample (unless I did some wront, didn’t worked that way to me). Of course, this is some sample code, and you have the entire source to adapt it to your needs.
Hope it helps!
Luis Manez
@luismanez


![clip_image001[4] clip_image001[4]](https://geeks.ms/cfs-file.ashx/__key/CommunityServer.Blogs.Components.WeblogFiles/lmanez/clip_5F00_image0014_5F00_thumb_5F00_75EA7FFE.png)
![clip_image002[4] clip_image002[4]](https://geeks.ms/cfs-file.ashx/__key/CommunityServer.Blogs.Components.WeblogFiles/lmanez/clip_5F00_image0024_5F00_thumb_5F00_49615018.png)
![clip_image001[6] clip_image001[6]](https://geeks.ms/cfs-file.ashx/__key/CommunityServer.Blogs.Components.WeblogFiles/lmanez/clip_5F00_image0016_5F00_thumb_5F00_409147CC.png)
![clip_image001[8] clip_image001[8]](https://geeks.ms/cfs-file.ashx/__key/CommunityServer.Blogs.Components.WeblogFiles/lmanez/clip_5F00_image0018_5F00_thumb_5F00_62B92D85.png)
![clip_image001[10] clip_image001[10]](https://geeks.ms/cfs-file.ashx/__key/CommunityServer.Blogs.Components.WeblogFiles/lmanez/clip_5F00_image00110_5F00_thumb_5F00_69A8BA3D.png)
![clip_image001[12] clip_image001[12]](https://geeks.ms/cfs-file.ashx/__key/CommunityServer.Blogs.Components.WeblogFiles/lmanez/clip_5F00_image00112_5F00_thumb_5F00_2423BA12.png)


