Mask animation with Xamarin.iOS and AutoLayout
In modern app development, we can’t think only of writing good code and full of features applications. We also have to create beautiful user experiences, and there is where animations take part in the game. Most common animations will change elements size, position or visibility to bring them to life.

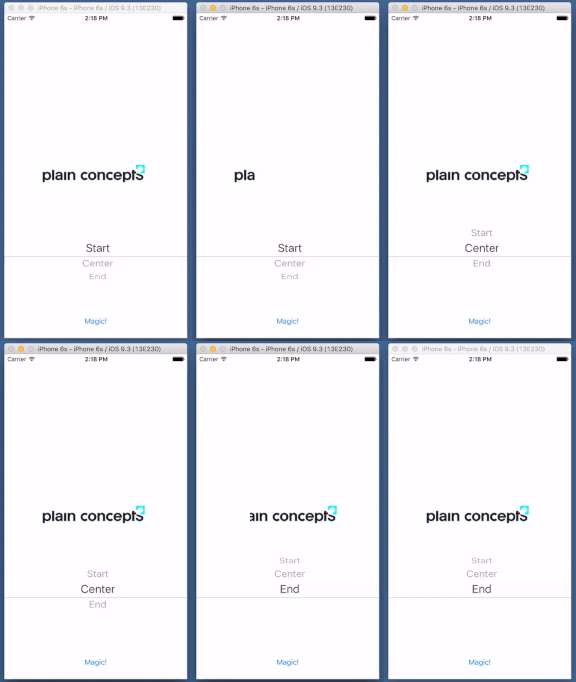
In one of our recent projects, a design team member had the idea of user interface elements that should be partially cropped depending on a score. Take a look to the image on the left that illustrates the concept.
There’s probably more than one way to do it. Our solution was to make use of maskView property, available since iOS 8. As documentation says:
The view’s alpha channel determines how much of the view’s content and background shows through. Fully or partially opaque pixels allow the underlying content to show through but fully transparent pixels block that content.
So, thanks to maskView property, we can create this type of effects on any element of user interface. Just need to keep in mind a few things:
- Remember to apply a background color to the mask, as it works with opaque pixels.
- Easiest way to animate that mask is to use bounds property, making it grow to full container dimensions.
- Use mask anchor point to easily change flow direction. In our sample, this is controlled by an UIPickerView.
You can access full sample code right here.
Hope it helps 🙂


Pingback: Marcos Cobeña Morián: Mask Animation with Xamarin.iOS and AutoLayout – XamGeek.com