Initial Steps with Xamarin.UITest for Hybrid Apps
Recently we have used Xamarin.UITest to validate the UI of an app developed with Cordova, and Test Cloud to run such on a lot of physical devices.
Assuming you have already experience creating a Xamarin.UITest project, the very first thing you will need to play with is running an emulator or a physical device to deploy the app and run the tests. Such is done with this very simple piece of code:
[code language=”csharp”]
public class AppInitializer
{
public static IApp StartApp(Platform platform, Xamarin.UITest.Configuration.AppDataMode mode = Xamarin.UITest.Configuration.AppDataMode.Auto)
{
if (platform == Platform.Android)
{
return ConfigureApp
.Android
.EnableLocalScreenshots()
.ApkFile(“../../../Apps/myapp.apk”)
.StartApp(mode);
}
return ConfigureApp
.iOS
.EnableLocalScreenshots()
.AppBundle(“../../../Apps/myapp.app”)
.StartApp(mode);
}
}
[/code]
Please take note we are going to test the UI of a multiplatform app developed with Cordova for iOS and Android, so we decided to have a single point to start both apps. The main goal behind this is to create a full cross-platform test suite for Android and iOS. So, with this little class, on every TestFixture we have, the “Setup” test method will look like:
[code language=”csharp”]
[SetUp]
public void BeforeEachTest()
{
app = AppInitializer.StartApp(platform);
}
[/code]
From now on, we can assume that before we run every single test, the app will be started to go through the home screen. Currently we can start making test of the UI.
The workflow is simple:
1- Wait until the element you want to interact with becomes visible on the UI:
[code language=”csharp”]
this.app.WaitForElement(c => c.WebView().Css(“div.MyStyleClass”));
[/code]
With this sentence, we are asking “app” to wait until a div in the WebView component appears. Note that the “WaitForElement” method admits some other parameters as the timeout, etc. This could be useful in some cases, for example, when the div is going to become visible after a long operation takes place.
2- Interact with the UI:
[code language=”csharp”]
this.app.Tap(c => c.WebView().Css(“div.MyStyleClass “));
[/code]
This method allows to easily simulate taps. The IApp interface that Xamarin.UITest offers has a lot of methods to interact with the app as ScrollDown, PressEnter, PinthToZoomIn, etc., whose you can call to achieve the desired behavior.
3- Wait until you want to test. We are going to assume that after tapping on the div we have been waiting for, another div will appear. So we wait once again for the second div.
[code language=”csharp”]
this.app.WaitForElement(c => c.WebView().Css(“div.MySecondDivClass”));
[/code]
The resulting test could be:
[code language=”csharp”]
[Test]
public void AfterTappingDiv2MustBeShown()
{
this.app.WaitForElement(c => c.WebView().Css(“div.MyStyleClass”));
this.app.Tap(c => c.WebView().Css(“div.MyStyleClass”));
this.app.WaitForElement(c => c.WebView().Css(“div.MySecondDivClass”));
}
[/code]
Now we have a test that can be run on the same app in both platforms, iOS and Android, and we expect both of them work in the same way.
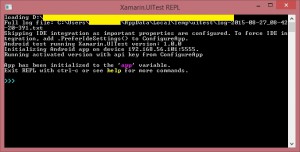
For every test we want to do, we will eventually need to “see” the code of the user interface. This is done with the “Repl()” method you cand find in IApp. By invoking the method a console app will appear in our screen:
In this window we can call every method IApp interface offers. It is very useful because you can use those to create the automated tests step by step.
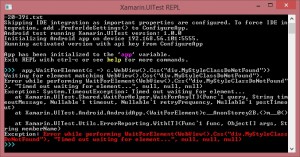
For example, if we wait for an element that it is not present on the UI, Repl command window will show something like this:
However, if the element exists on the screen, REPL will show us the HTML code of the element.
With this simple functionality, we have been able to turn manual tests to automated ones. A very expensive work has been transformed into an automated and cheaper one.


