Some ideas on feature flags

In the last weeks I have had several interesting conversations on feature flags, so I just wanted to do a little brain dump on my ideas/views on feature flags, this are my particular views at this moment, they can change :). Also, at this moment I have not heavly used them in production, I have tried them in production, but just in little scenarios, this is what I have learned and discussed with people who have been using the a lot.

First things first, for me feature flags is all about experimentation and testing hypothesis. I just use feature flags which are short lived so the code related to the flag itself is not so long inside the code, usually they are “if’s” or lambdas, so once tested the hypothesis I would clean them up, if hte hypothesis for a particular feature works, the rest of the code remains, if not, the rest of the code is cleaned. So when using a feature flag, it is important to track its  life cycle so no “dead code” is left behind.

Next thing is almost obvious, if we are testing an experiment or a hypothesis, how and when we do know it worked or not?. We must work with business on this particular decisions and ask the stakeholders and team that question, this will lead us to something which is crucial, which metrics do we need to track for the feature we are experimenting, so be sure to track the usage and provide good metrics and a way to check them so you can take a decision about the feature. Probably taking the decision on which metrics and when to go ahead with the feature, it is harder than the implementation.

How we will handle the activation/deactivation? Some features can be even enabled/disabled by the users itselves, but not always, so we will have to decide how to do it, maybe we will enable them based on percentages, geolocation, or even automatically based on metrics, so when we go ahead with a feature flags system, be sure to know how are you going to be activating them during it’s life. For me this goes tight with the deployment of our application, so we must support enabling/disabling them not only via a UI or configuration files, but from outside systems which can interact with them and the system decided for rolling-out them with for example APIs or similar mechanism.

Last but not least, visibility, I started saying I prefer short lived flags, so how many flags we have in our code? which is the state (enabled/disabled) of them for our user base? keep in mind to keep them tracked in any mechanism you can provide so no “dead code” is left behind.

Just for you to check out a couple of feature flags systems, if you are on .NET Core you have this library, created by Xabaril Team, which is interesting and I know they are working on improve it. Also if you are looking for commercial products, probably Launch Darkly is one of the feature flags systems which is growing fast in use and capabilities.

Feel free to comment on this via comments or just reach me out in twitter.

Variable library groups and Azure Key Vault

In my previous post, I explained how to use Azure Key Vault values in a particular Build/Release, but as Vinicius Moura posted in twitter, there is another option using Libraries in your Team Project, and I wanted to just give my opinion or how I use one or another option.

Just to introduce it, Libraries is a method to create Task Variables which can be used across different Builds/Releases in a particular Team Project. To create a Library go to the Build and Release hub in VSTS, click on Library  and then click, on the upper right corner + Variable Group.image

Here we can define a new Library and define its variables and values, just giving the Library a name to then use it in Builds/Releases, and create variables.

image

Also we have the option to link secrets from Azure Key Vault, as Vinicius pointed. Just one thing, when you link a library to Azure Key Vault secrets, you can’t add new manual variables for that library. In the process of linking to an Azure Key Vault, you will need to select an Azure Subscription, and authorize VSTS for both access the subscription and the desired Azure Key Vault, so be sure you are using an account with the proper rights.

image

Then you can just click on  + Add  to add new variables from the Azure Key Vault, as, differently from the Azure Key Vault task, it does not adds the contents from the Vault automatically.

image

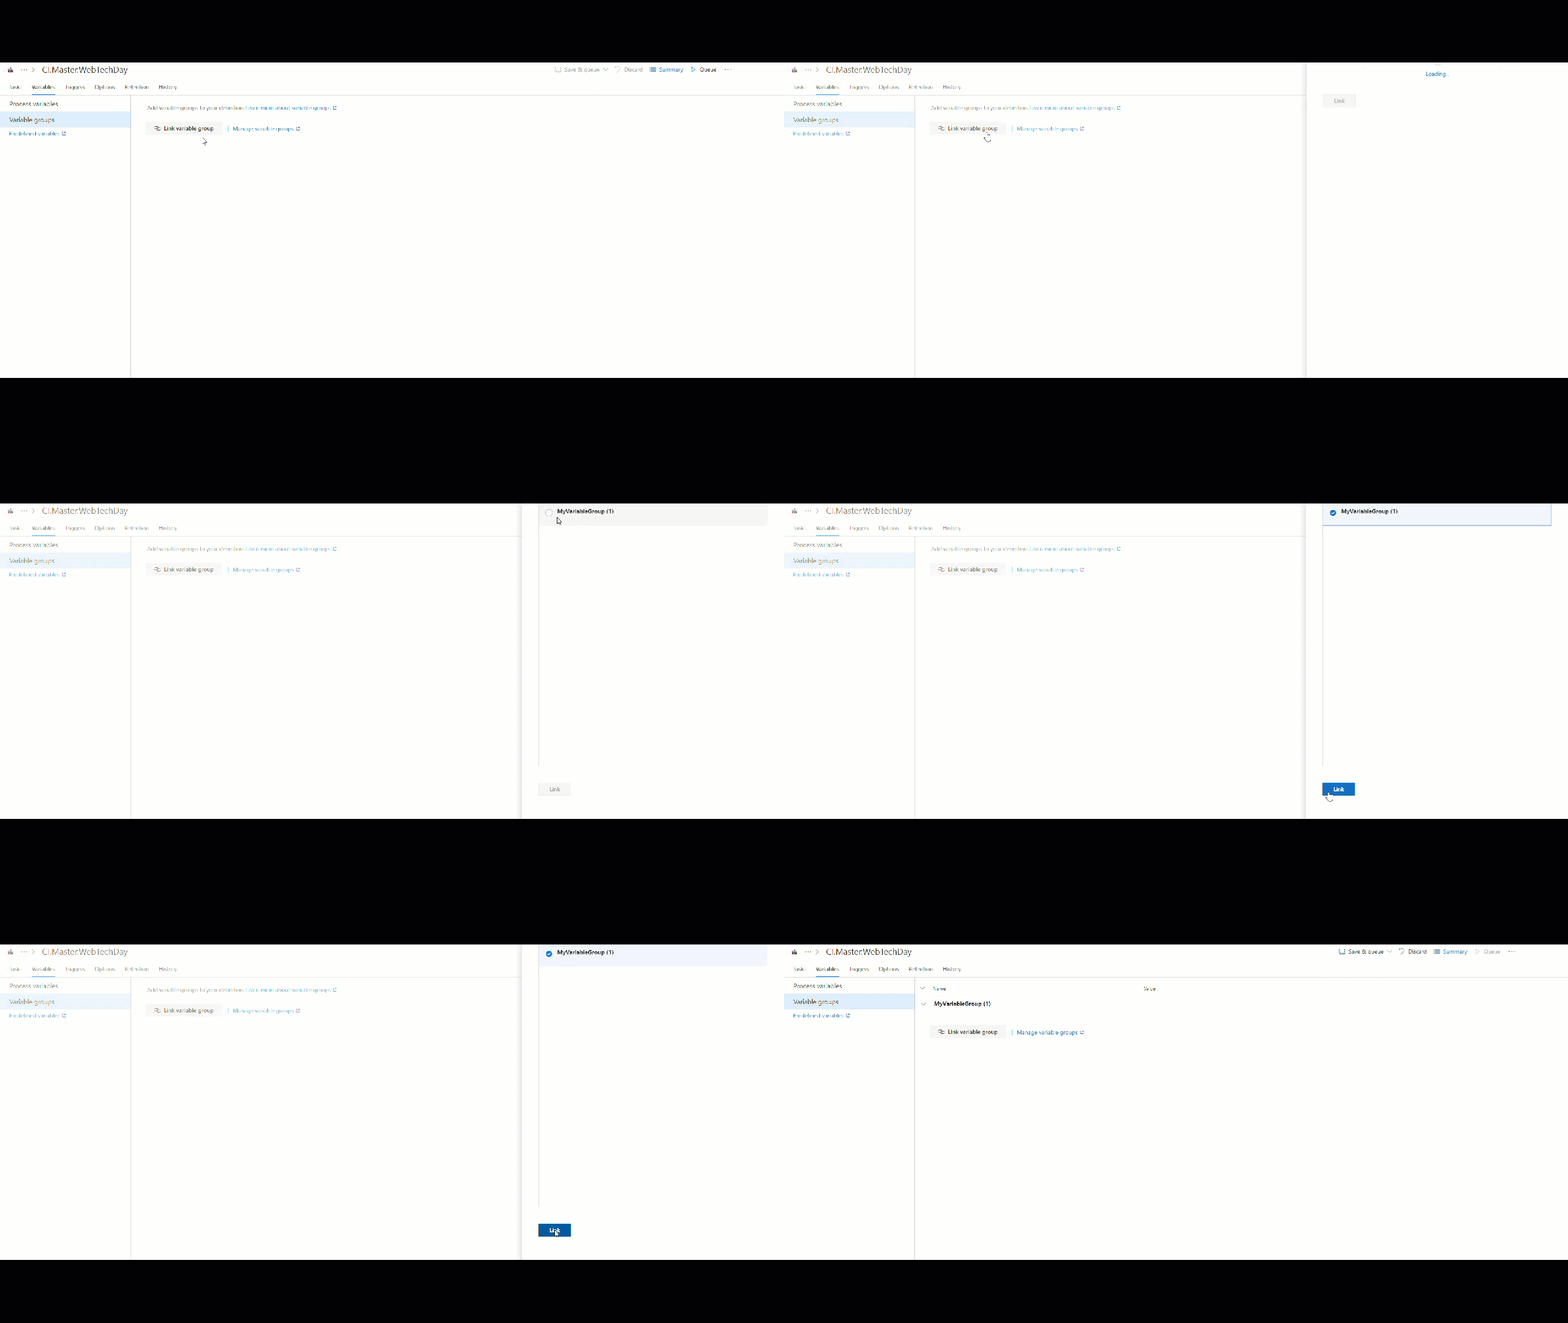
Once you create the Library with your custom variables or the Azure Key Vault connection, you can just use it in a Build or Release, in the variables section when editing a build, clicking on Link variable group and selecting the variable group.

2018-02-24_17-52-58

When you link the Library group you can start using the variables with the usual syntax on your Build/Release: $(myvariable)

So, now that I explained Libraries, why and when choose this or the task option? Well for me it is just a question on how you are going to use it, and also the related security. By default, if I need values which must be shared across different builds/releases I would go for libraries for sure, but when it comes to Azure Key Vault, they are used to keep things protected and secret, if you create a library with its default permissions, you are sharing the possibility of using this secrets (and potentially leak them) to any VSTS user with contributor permissions in that particular Team Project, so if you do not pretend that, you must take care of setting the appropriate permissions on the Library, this is not a problem or anything, it is something you are suppose to do and take care of.

When you use the task, only people allowed to edit that particular build will be able to use this secrets, of course, you have to take care of this permissions too.

So, in my opinion, if you don’t need to share the variables across several builds/releases, or you just want to keep them as restricted as possible, go with the tasks. If you want to protect a set of values that you want to re-use across builds and releases, go with the libraries.

Just remember, this is not a rule, this is just my opinion, and is always subject to change a lot Smile

Debugging deployed Azure Web Apps with VSTS Symbol Server

Obviously, debugging an already deployed application, doesn’t matter if Azure or any other environment, is something we must use as a last resort, I would always prefer to be able to reproduce some kind of situation with a local test and correct it. But sometimes we would need to debug an already deployed application, and it is never as easy as click F5 in our Visual Studio. We must connect to remote processes, make sure we have the right version of the code, and more important, be able to match the binaries with the code we have, because surely you always build your applications as Release to deploy them (and if not … run, run and do it).

Having the right version of the application is easy we have branches, tags, and other tools which allows us to locate the right code version. Attach to remote processes is something maybe a little bit more complex, but fortunately we have Remote Debugging tools, and even more, in Azure Web Apps, we can directly enable it from Visual Studio or the portal, and connect automatically, we will see this later.

To make sure we match the binaries with the code we have symbols, but we need to have the right symbols for the binaries, something we can get via a Symbol Server, this is something you can setup by yourself, but luckily now we have a Symbol Server included in VSTS, well it is still in preview mode, but it is something rather interesting to setup and worth it. Let’s start on how to set it up.

Disclaimer: I’m not digging into how to create a build definition, or deploy an application to Azure Web App using Release Management, so if you are not familiar with this kind of tasks first make familiar with these, or just leave me a comment if you find it interesting for next blog posts.

Disclaimer II: You will need Visual Studio 2017 updated to the last update for doing this.

Enabling the feature

As a preview feature, we must first turn it on for our account, or ask something with the needed privileges to turn it on, we just click on the top right, in our account icon, select Preview features and enabled it for the account.image

But in this case, this is not a stand-alone feature, this feature needs the Package Management extension from the Visual Studio Marketplace, which, remember, is not free, but the symbol server added to the package management extension is worth the price.

Publishing symbols

Once set-up the account we can start publishing our symbols. Usually (if not … again … run) we have one build, n deployments. So this is something we are doing during the build. So let’s go to edit the build definition used to generate artifacts for deploy, and add a new step after the build step, and add the publish symbols task.

image

By default, when adding the task, it is added with the version 1.*, but we will select version 2.* (preview) version of the task, and in the Symbol server type parameter, we select Symbol server in this account … I will remind you the need of Package Management extension.

image

This is the only change we need to do in our build or releases. So let’s go to next step.

Configuring Visual Studio to consume VSTS Symbol Server

We must configure Visual Studio for a couple of things: instruct it to debug using symbol servers, which symbol servers to use. We will do both of them from the Tools / Options screen.

For the first one we go to Debugging section of tools, and disable Enable just my code, yes, disable it, so Visual Studio is instructed to debug external code.

image

Now under Debugging / Symbols, click on the icon I show you in the next picture, which will bring the add new Symbol Server from VSTS. You can leave the rest of the parameters with the default values.

image

On the next screen just select the VSTS account in which you set-up the symbol server. And after that close the Options screen.

image

Debugging the Azure Web App

If we came this far, we have everything ready to start debugging, so with the version of the code we published the symbols and deployed open into Visual Studio, we will attach to the Web App process for debugging. Be sure to enable the breakpoints you need for the debugging and also notice you will impact any user of the application so better do it in a slot or any environment with no real users.

On Visual Studio 2017 Server Explorer, make sure you are connected to the Azure Subscription, and in the App Service list, locate the resource group containing your app, locate the app (and the slot if you have it), right click it, and select Attach debugger.

image

This can take a while, but after finish the attach, it will automatically connect to the Symbol Server, get the debug Symbols and you are ready to go and start debugging your web app with the breakpoints and the debugging features of Visual Studio and Azure.

If you receive an alert like this.

image

Remember to disable the Enable Just my code mentioned earlier in this same post.

Keep it clean

After debugging, this is something I like to do, and is go to the Azure Web App Application Settings, and disable the remote debugging check. Next time you need to debug, following previous steps, Visual Studio will re-enable it for you, but I just like to keep it off … just for the case …

image

Hope you enjoyed this feature as much as I do.

Sample VSTS Build and Release Management task for Yarn package manager

During this weekend I wanted to try the new package manager Facebook created: Yarn, one of it’s bigger claims is to be faster than normal npm, although it uses the same package repositories as npm. this is done, as far as I know, using improvements in transfer the files along with a local package cache, so you don’t have to go always to npm to restore a package you already restored previously for other project.

As locally it was everything working smoothly, I decided create a new build task for VSTS so I can use it in my builds. First point it is only based to be used with your own agents for several reasons: first it has a demand which requires yarn to be installed (hosted agents does not have it … yet …), second, as said previously it uses a local cache to be faster, so at this moment, it made no sense to me to prepare something to be used with hosted agents, remember hosted agents are created on-the-fly so unless you need to restore packages for  several projects per build (next scenario I will try to cover), Yarn will be not necessary (well I agree it also improves download speed, but …).

So, for this first version, I just looked at the code of the current npm task and modified it to use Yarn, it is pretty simple and straightforward. The code is in my github account: https://github.com/lfraile/YarnTask

Feel free to see it, modify it, play with it and install it, I will be reviewing it for some improvements.

PD: Just as I was writing this post, I noticed something I should have look before … There is already a Yarn task in the Marketplace, hehehe, as I mention in my talk about creating custom tasks: always look if there is something available before build it … so well .. my fault … but, still, I will continue trying to improve it.