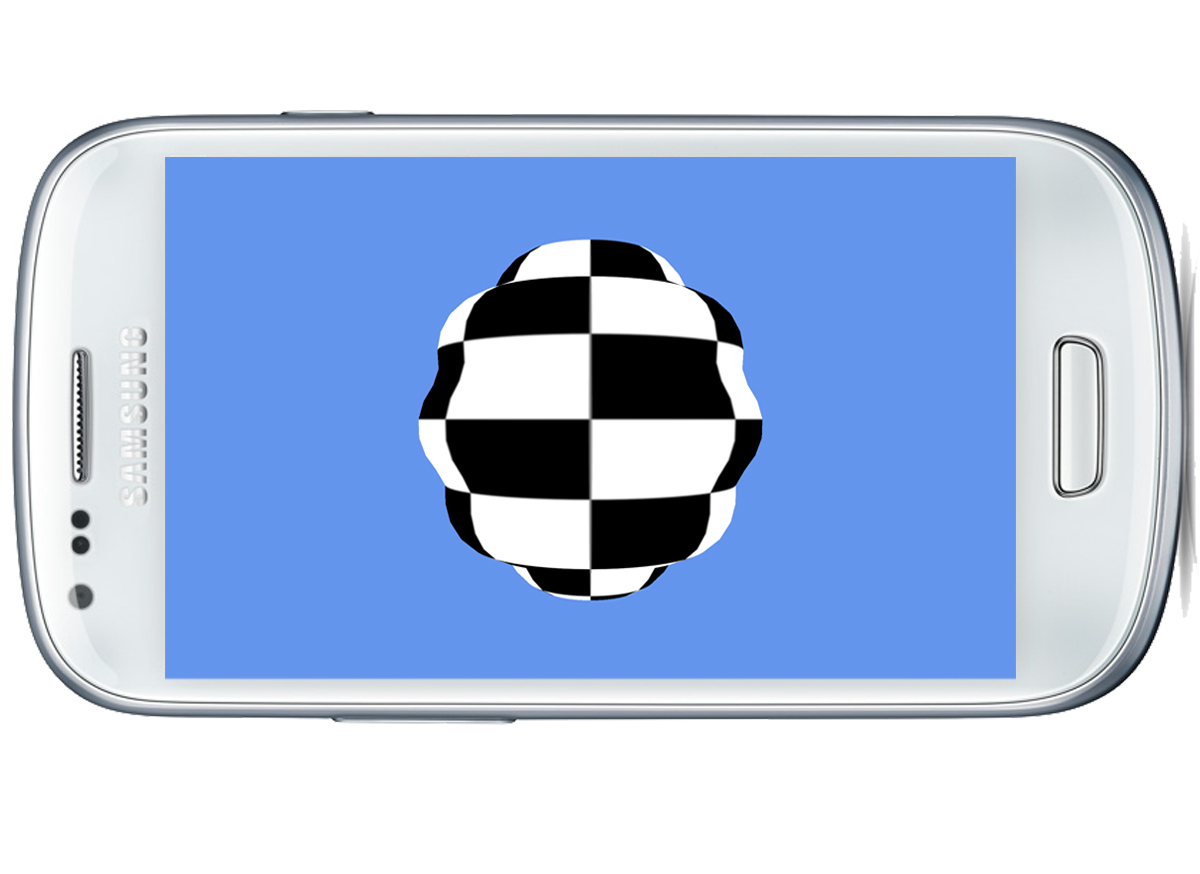
In this tutorial we will learn how to create a new material with custom rendering to use on any Wave Engine game.
This tutorial assumes that the reader has experience with HLSL and GLSL shader programming.
Getting Started
Start by creating a new Wave Engine game project using Wave Visual Editor. Add an entity that contains a test shape to the scene (a simple sphere in this case); this way, we will be able to see how our new material behaves when we implement it:
|
1 2 3 4 5 6 7 8 9 10 |
FreeCamera mainCamera = <span class="hljs-keyword">new</span> FreeCamera(<span class="hljs-string">"Camera"</span>, <span class="hljs-keyword">new</span> Vector3(<span class="hljs-number">0</span>, <span class="hljs-number">0</span>, <span class="hljs-number">10</span>), Vector3.Zero); <span class="hljs-keyword">this</span>.EntityManager.Add(mainCamera); <span class="hljs-comment">//Insert your code here</span> Entity testShape = <span class="hljs-keyword">new</span> Entity(<span class="hljs-string">"TestShape"</span>) .AddComponent(<span class="hljs-keyword">new</span> Transform3D()) .AddComponent(Model.CreateSphere(<span class="hljs-number">5</span>, <span class="hljs-number">32</span>)) .AddComponent(<span class="hljs-keyword">new</span> MaterialsMap(<span class="hljs-keyword">new</span> MyMaterial(</code>WaveContent.Assets.DefaultTexture_png<code class="lang-csharp hljs">))) .AddComponent(<span class="hljs-keyword">new</span> ModelRenderer()); EntityManager.Add(testShape); |
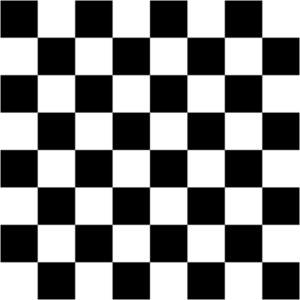
We need to add the “DefaultTexture.png” file into your Assets folder.

You can use any texture you want, we have used this:
We have purposely created the sphere with a larger tessellation because in the sample shader we are going to perform a displacement transformation and without enough vertices it would look ugly.
Creating the material
Add a new class to your Game project called MyMaterial and make it inherit from WaveEngine.Framework.Graphics.Material. You will notice that Visual Studio warns you that the class must implement CurrentTechnique() method. These members, along with SetParameters(), are mandatory for each custom material and we will explain later what each one does.
Defining shader techniques
We will start by creating a static array of ShaderTechnique objects. Inside each of them, we will store the parameters that the adapter will need to create the internal shader objects: the technique name, the vertex and pixel shader file names and a VertexFormat with the same layout of the input structure of the vertex shader.
|
1 2 3 4 5 6 7 8 |
<span class="hljs-keyword">private</span> <span class="hljs-keyword">static</span> ShaderTechnique[] techniques = { <span class="hljs-keyword">new</span> ShaderTechnique(<span class="hljs-string">"MyMaterialTechnique"</span>, <span class="hljs-string">"MyMaterialvs"</span>, <span class="hljs-string">"MyMaterialps"</span>, VertexPositionNormalTexture.VertexFormat), }; |
In the snippet code we are creating a single technique called “MyMaterialTechnique” that uses the VertexPositionNormalTexture vertex format (each vertice will have a Position, Normal and Texture coordinates).
This way, when we need to initialize each technique, we will have all of its properties already stored to be able to easily access them.
Declaring shader parameters
We need to create a structure that will hold all the parameters accessed by the shader. Since it is directly mapped to a buffer, we need to specify its StructLayout as LayoutKind.Sequential; and due to technical limitations of DirectX, it must have a size multiple of 16 bytes (although the total size of the contained members can be less than that). Then, declare a private member variable that will hold an instance of the struct containing the parameters.
|
1 2 3 4 5 6 7 8 |
[StructLayout(LayoutKind.Sequential, Size = <span class="hljs-number">16</span>)] <span class="hljs-keyword">private</span> <span class="hljs-keyword">struct</span> MyMaterialParameters { <span class="hljs-keyword">public</span> <span class="hljs-keyword">float</span> Time; } <span class="hljs-keyword">private</span> MyMaterialParameters shaderParameters = <span class="hljs-keyword">new</span> MyMaterialParameters(); |
Adding a texture map
Since this sample material shows how texture mapping is done, we are going to need a property that stores a handle to an existing Texture object. Then, there are two ways to construct the material with the specified texture:
- Pass a Texture object as a parameter to the constructor.
- Pass a string that contains the path of the Texture asset and the material will load it when needed.
We are going to illustrate the second method, so add a string field and a Texture property:
|
1 2 3 4 5 6 7 8 |
<span class="hljs-keyword">private</span> <span class="hljs-keyword">string</span> diffuseMapPath; <span class="hljs-keyword">public</span> Texture DiffuseMap { <span class="hljs-keyword">get</span>; <span class="hljs-keyword">set</span>; } |
We will show later how to initialize them.
Selecting the appropriate technique
Remember that CurrentTechnique field that was mentioned previously? It is a read-only field that returns the name of the shader’s technique that should be used when drawing depending on how the material is configured (Is lighting enabled? Should I draw using a texture?). Since this sample material only has one technique, this will be pretty straightforward:
|
1 2 3 4 5 |
<span class="hljs-keyword">public</span> <span class="hljs-keyword">override</span> <span class="hljs-keyword">string</span> CurrentTechnique { <span class="hljs-keyword">get</span> { <span class="hljs-keyword">return</span> techniques[<span class="hljs-number">0</span>].Name; } } |
Laying out the constructor
The constructor of the custom material takes care of initializing the default values of the material. The only requirements that you must always meet is assigning the private instance of the struct containing the parameters to the Parameters property. This is done so DirectX can properly map the structure’s layout to its internal buffers when creating the shader object. After this, you can safely call InitializeTechniques() passing the array of ShaderTechnique previously defined as the only parameter:
|
1 2 3 4 5 6 7 8 |
<span class="hljs-function"><span class="hljs-keyword">public</span> <span class="hljs-title">MyMaterial</span><span class="hljs-params">(<span class="hljs-keyword">string</span> diffuseMap)</span> : <span class="hljs-title">base</span><span class="hljs-params">(DefaultLayers.Opaque)</span> </span>{ <span class="hljs-keyword">this</span>.diffuseMapPath = diffuseMap; <span class="hljs-keyword">this</span>.Parameters = <span class="hljs-keyword">this</span>.shaderParameters; <span class="hljs-keyword">this</span>.InitializeTechniques(techniques); } |
Initializing specific assets
The function Initialize(…) takes care of initializing any members that couldn’t be done in the constructor; for example, Texture assets need to be loaded into an AssetsContainer to properly manage their lifetime. We are going to load here the texture that is needed for our shader:
|
1 2 3 4 5 6 7 8 9 10 11 12 |
<span class="hljs-function"><span class="hljs-keyword">public</span> <span class="hljs-keyword">override</span> <span class="hljs-keyword">void</span> <span class="hljs-title">Initialize</span><span class="hljs-params">(AssetsContainer assets)</span> </span>{ <span class="hljs-keyword">try</span> { <span class="hljs-keyword">this</span>.DiffuseMap = assets.LoadAsset<Texture2D>(<span class="hljs-keyword">this</span>.diffuseMapPath); } <span class="hljs-keyword">catch</span> (Exception e) { <span class="hljs-keyword">throw</span> <span class="hljs-keyword">new</span> InvalidOperationException(<span class="hljs-string">"MyMaterial needs a valid texture."</span>); } } |
Passing parameters to the shader
The SetParameters(…) method passes any necessary data to the shader. You must perform these actions in the specified order:
- Call base.SetParameters
- Change any shader parameters in the private struct instance that was previously created (in this case, shaderParameters).
- Assign the struct instance to the Parameters field.
- Set any textures you wish to use in the correct texture slots.
|
1 2 3 4 5 6 7 8 9 10 11 |
<span class="hljs-function"><span class="hljs-keyword">public</span> <span class="hljs-keyword">override</span> <span class="hljs-keyword">void</span> <span class="hljs-title">SetParameters</span><span class="hljs-params">(<span class="hljs-keyword">bool</span> cached)</span> </span>{ <span class="hljs-keyword">base</span>.SetParameters(cached); <span class="hljs-keyword">this</span>.shaderParameters.Time = (<span class="hljs-keyword">float</span>)DateTime.Now.TimeOfDay.TotalSeconds; <span class="hljs-keyword">this</span>.Parameters = shaderParameters; <span class="hljs-keyword">this</span>.graphicsDevice.SetTexture(<span class="hljs-keyword">this</span>.DiffuseMap, <span class="hljs-number">0</span>); } |
Write the material shaders
We need a shader to use our new material. We need to write the shader in two languages: HLSL (DirectX platform) and GLSL (OpenGL platform) if we want cross platform support.
- HLSL: Windows platform (Desktop & UWP)
- GLSL: Linux, Android, MacOS, iOS
Writing the DirectX shader (HLSL)
Now that we have all the code to use our material inside Wave, we must write the shaders that will be called. We will start with the DirectX one.
We start by adding a folder with the name “Shaders” to the project that contains the material class (MyMaterial.cs). Inside this directory, we create one called “HLSL” and another called “GLSL”. Both directories will contain as many folders as materials we are creating, with the same name as the material’s class.
Important: The “Shaders”, “HLSL” and “GLSL” names are mandatory to allow Wave to find the material shaders.
Inside the HLSL folder, create a new .fx and name it MyMaterial.fx. This file will contain the shader source code (DirectX). This file is only used as an intermediate step because Wave needs the shader in binary form. However, with GLSL it is not necessary to compile to binary (OpenGL).
Start by adding the following code to MyMaterial.fx file:
|
1 2 3 4 5 6 7 |
cbuffer Matrices : register(b0) { float4x4 WorldViewProj : packoffset(c0); float4x4 World : packoffset(c4); float4x4 WorldInverseTranspose : packoffset(c8); }; |
Important: This buffer is mandatory to all shaders as it contains the matrices automatically mapped by Wave.
If you need additional parameters, you can pass them on the Parameters buffer.
|
1 2 3 4 |
cbuffer Parameters : register(b1) { <span class="hljs-keyword">float</span> Time : packoffset(c0.x); }; |
This is the buffer that maps the custom parameters passed to the shader. Remember to lay them in the appropriate order and use the packoffset directive as needed.
|
1 2 3 |
Texture2D DiffuseTexture : register(t0); SamplerState DiffuseTextureSampler : register(s0); |
Remember the SetParameters() method in MyMaterial class, where we wrote this sentence at the end “this.graphicsDevice.SetTexture(this.DiffuseMap, 0);“. With this sentence we are indicating that we will use the slot “0” to pass the texture to the shader.
For each texture we want to pass to the shader, we will need to indicate the Texture2D (into the t[slotNumber] register) and SamplerState (into the s[slotNumber] register) shader attributes.
Now we will create the Vertext Shaders Input and Output structures:
|
1 2 3 4 5 6 7 8 9 10 11 12 13 |
<span class="hljs-keyword">struct</span> VS_IN { float4 Position : POSITION; float3 Normal : NORMAL0; float2 TexCoord : TEXCOORD0; }; <span class="hljs-keyword">struct</span> VS_OUT { float4 Position : SV_POSITION; float2 TexCoord : TEXCOORD0; }; |
Check that the vertex shader input structure matches the vertex format you specified on the shader technique declaration – in this case, VertexPositionNormalTexture:
|
1 2 3 4 5 6 7 8 |
<span class="hljs-keyword">public</span> <span class="hljs-keyword">struct</span> VertexPositionNormalTexture : IBasicVertex { <span class="hljs-keyword">public</span> Vector3 <strong>Normal</strong>; <span class="hljs-keyword">public</span> Vector3 <strong>Position</strong>; <span class="hljs-keyword">public</span> Vector2 <strong>TexCoord</strong>; <span class="hljs-keyword">...</span> } |
Now, we will proceed to write the vertex and pixel shader functions. The vertex shader will apply a simple sine deformation based on the Time parameter passed, and the pixel shader will sample from the texture and map it to the surface:
|
1 2 3 4 5 6 7 8 9 10 11 12 13 14 15 16 17 |
<span class="hljs-function">VS_OUT <span class="hljs-title">vsMyMaterial</span><span class="hljs-params">( VS_IN input )</span> </span>{ VS_OUT output = (VS_OUT)<span class="hljs-number">0</span>; <span class="hljs-keyword">float</span> offsetScale = abs(sin(Time + (input.TexCoord.y * <span class="hljs-number">16.0</span>))) * <span class="hljs-number">0.25</span>; float4 vectorOffset = float4(input.Normal, <span class="hljs-number">0</span>) * offsetScale; output.Position = mul(input.Position + vectorOffset, WorldViewProj); output.TexCoord = input.TexCoord; <span class="hljs-keyword">return</span> output; } <span class="hljs-function">float4 <span class="hljs-title">psMyMaterial</span><span class="hljs-params">( VS_OUT input )</span> : SV_Target0 </span>{ <span class="hljs-keyword">return</span> DiffuseTexture.Sample(DiffuseTextureSampler, input.TexCoord); } |
Compiling the DirectX shader
Since HLSL shaders need to be compiled, we are going to use the fxc.exe tool for this:
- If you are on Windows 7, you will need to install the latest DirectX SDK, and you can find it in the “Utilities\bin\x86” directory.
- If you are on Windows 8 or Windows 10, this tool is included in the Windows SDK, that is usually placed in the“Program Files (x86)\Windows Kits\8.0\bin\x86” directory.
Now, remember that you must compile the shaders using the shader model 4.0 – DirectX 9.1 level target profile so the same shader can be used across Windows, and Universal Windows Platform builds:
|
1 2 3 |
fxc.exe /nologo MyMaterial.fx /T vs_4_0_level_9_1 /E vsMyMaterial /Fo MyMaterialvs.fxo fxc.exe /nologo MyMaterial.fx /T ps_4_0_level_9_1 /E psMyMaterial /Fo MyMaterialps.fxo |
Add the output files to the HLSL/MyMaterial directory of your project and remember to set the Build Action as Embedded Resource (it is necessary on all platforms).
Your project tree will look like this:

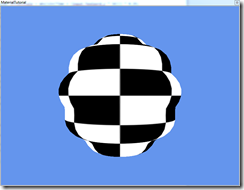
Now try launching your project and you will see the result if there are no errors:
Writing the OpenGL shader (GLSL)
Now, it’s time to add the shader for OpenGL platforms. We must translate the HLSL code to GLSL.
Create the vertex file MyMaterialvs.vert and add this code:
|
1 2 3 4 5 6 7 8 9 10 11 12 13 14 15 16 17 |
uniform mat4 WorldViewProj; uniform <span class="hljs-keyword">float</span> Time; attribute vec3 Position0; attribute vec3 Normal0; attribute vec2 TextureCoordinate0; varying vec2 outTexCoord; <span class="hljs-function"><span class="hljs-keyword">void</span> <span class="hljs-title">main</span><span class="hljs-params">(<span class="hljs-keyword">void</span>)</span> </span>{ <span class="hljs-keyword">float</span> offsetScale = abs(sin(Time + (TextureCoordinate0.y * <span class="hljs-number">16.0</span>))) * <span class="hljs-number">0.25</span>; vec3 vectorOffset = Normal0 * offsetScale; gl_Position = WorldViewProj * vec4(Position0 + vectorOffset, <span class="hljs-number">1</span>); outTexCoord = TextureCoordinate0; } |
And now, create the fragment file MyMaterialps.frag with this code:
|
1 2 3 4 5 6 7 8 9 10 11 12 13 |
<span class="hljs-preprocessor">#ifdef GL_ES</span> precision mediump <span class="hljs-keyword">float</span>; <span class="hljs-preprocessor">#<span class="hljs-keyword">endif</span></span> uniform sampler2D TextureMap; varying vec2 outTexCoord; <span class="hljs-function"><span class="hljs-keyword">void</span> <span class="hljs-title">main</span><span class="hljs-params">(<span class="hljs-keyword">void</span>)</span> </span>{ gl_FragColor = texture2D(TextureMap, outTexCoord); } |
Note that, since OpenGL doesn’t have support for variable buffers right now, the parameters of the shader are specified as uniform variables and the format of the vertex buffer as attributes. Apart from that, the shader is very similar to the one made in HLSL. Because of this, we must follow some naming conventions in your GLSL code:
- Each vertex attribute must follow the following naming convention:[VertexElementUsage][UsageIndex], (for example, Position0 refers to the first vertex position channel and Texture1 is the second texture coordinate channel)
- Each Texture name must be equal to the Texture property defined in your material c# class (for example: TextureMap is the same name as the MyMaterial.TextureMap property)
Remember to add them to your solution under /Shaders/GLSL/MyMaterial/ and set the Build Action as Embedded Resource. In this case, there is NO need to compile the shader files as we did with HLSL:

Now, create an Android profile (here you can see a tutorial) and run it. In case there are any errors compiling the new shaders, they will be written on the Output window of Visual Studio.

Get the Code
You can get the full code here

