Sometimes we need to integrate Wave Engine in some projects our clients need. In this post we would like to share how this can be achieved for XAML projects with a few steps.
Create a project with Wave Editor
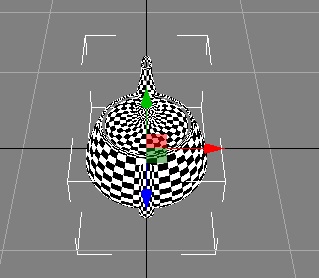
The first step is to create a project with Wave Editor. We can just create an empty project and, for example, add a teapot to the scene through the Entities Hierarchy panel:
Create the WPF project
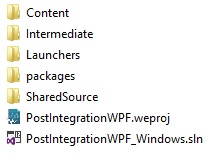
Once the project is created navigate to the folder of the project and you will find something similar to:
This is the structure that Wave Editor creates and uses to work with IDE’s as Visual Studio and Xamarin Studio.
We will duplicate the PostIntegrationWPF_Windows.sln solution to create a WPF project to integrate Wave Engine on it.
So make a copy of PostIntegrationWPF_Windows.sln, rename it to PostIntegrationWPF _WPF.sln and open the solution with Visual Studio.
From the Solution Explorer remove the project called PostIntegrationWPF, add a new WPF project to the solution and name it exactly as the removed project PostIntegrationWPF.
Important: The reason to name the WPF project exactly with the previous one is because Wave Engine uses the project name to find the corresponding .weproj that Wave Editor need to export the different assets in the target you can find in the folder packagesWaveEngine.2.0.4.20buildnet45 WaveEngine.targets. So if you do not name the new project as the removed one, you won’t be able to compile due the target will not find the .weproj file.
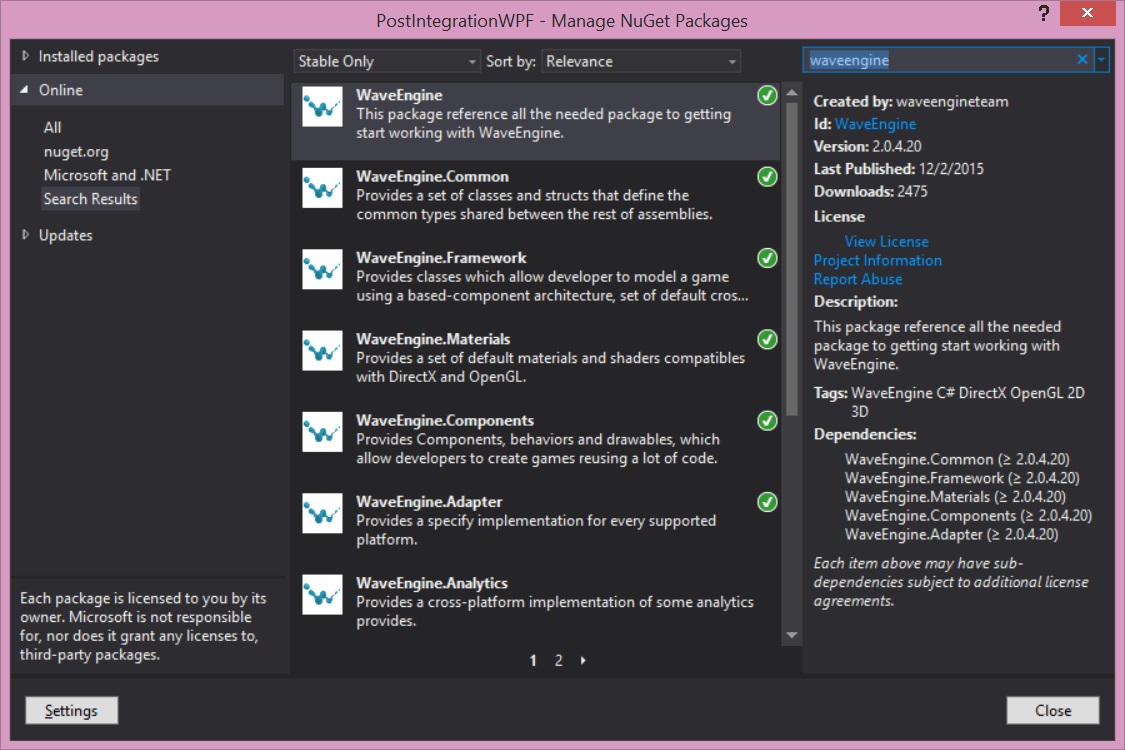
The next step is to add the Wave Engine nugget packages to the WPF project:
Just add the “WaveEngine” package and all dependences will automatically be added.
Add a reference to the shared project named PostIntegrationWPFSource. That project is the platform independent project that make Wave Engine able to be used in all platforms.
Note: If you are using VS 2013 you will need to use “Shared Project Reference Manager” plugin to add the reference.
Add some components to the project
You will need two components that can be found on git hub in the Integration sample:
https://github.com/WaveEngine/Samples/tree/master/Integrations/GUIIntegrations/Launchers/WaveWPF
Download and add the SplashScreen.wpk file to the WPF project as an “embedded resource”.
Download and add MainApp.cs and WaveCanvas.cs to the WPF project.
MainApp.cs is a WPF adapter implementation that creates the Update/Draw cycle that Wave Engine need to work.
WaveCanvas.cs is a WPF control that manages the different keys, mouse, and resize inputs to the MainApp component. And it is used as the canvas where MainApp.cs will draw the scene.
Use the component on XAML
The last step is to use the WaveCanvas component on XAML, so add the reference to the namespace we have used in MainWindow.xaml:
xmlns:local=”clr-namespace:PostIntegrationWPF”
And use it on a grid for example:
<Grid x:Name="mainGrid">
    <Grid.RowDefinitions>
		<RowDefinition Height="*" />
		<RowDefinition Height="Auto" />
	</Grid.RowDefinitions>
	<local:WaveCanvas x:Name="waveCanvas" />
	<Button Content="I am a Button"
			Height="100"
			Grid.Row="1" />
</Grid>
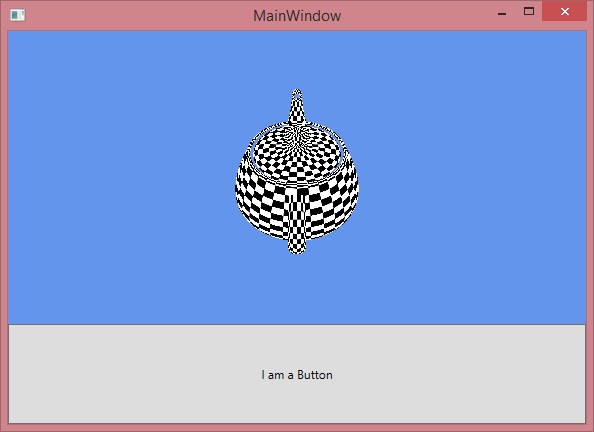
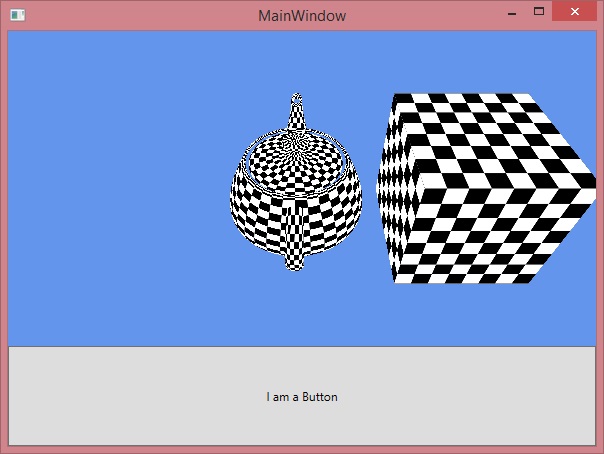
If you build and run, you will get something similar to:
If you modify the scene with the Wave Visual Editor you will get those changes when you recompile your WPF project. So open the .weproj project with Wave Visual Editor and add a cube model as you did with the teapot, save the project with Wave Visual Editor and if you rebuild with Visual Studio you will see the cube added:
Other integrations
Apart from the WPF integrations you can see how to integrate Wave Engine with Windows Forms and GTK# at our git hub: https://github.com/WaveEngine/Samples/tree/master/Integrations/GUIIntegrations
Happy coding!
